Advertisements

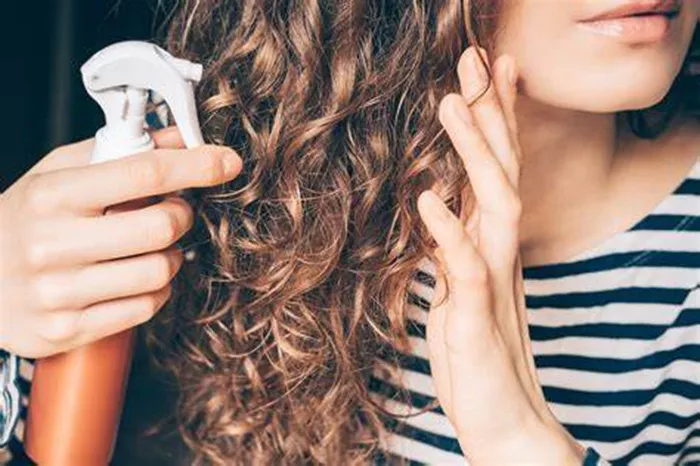
Morning Routine for Styling Dry Curly Hair

by gongshang16

Finger waves are a classic hairstyle that has been around since the 1920s. They exude elegance, glamour, and a touch of vintage charm. While often associated with shorter hair, creating finger waves on long natural hair is not only possible but can result in a stunning and unique look. In this comprehensive guide, we will walk you through everything you need to know to achieve beautiful finger waves on your long natural hair.

Preparing Your Hair

Cleansin & Detangling

The first step in creating finger waves is to start with clean, detangled hair. Wash your hair with a gentle, sulfate – free shampoo to remove any product buildup, dirt, or oil. This will provide a clean canvas for the styling products to adhere to. After shampooing, apply a rich, moisturizing conditioner. Use a wide – toothed comb to carefully detangle your hair, starting from the ends and working your way up to the roots. This helps to prevent breakage and ensures that your hair is smooth and ready for the next steps.

Advertisements

Moisturizing & Conditioning

Long natural hair tends to be dry, so it’s crucial to add moisture back into your strands. Apply a leave – in conditioner or a hair cream. Work the product through your hair, focusing on the mid – lengths and ends, which are usually the driest parts. You can also use a hair oil, such as argan oil or jojoba oil, to seal in moisture and add shine. This extra layer of moisture will help your hair hold the waves better and prevent it from becoming frizzy.

Advertisements

Stretching Your Hair

Stretching your long natural hair before creating finger waves can make the process easier and result in more defined waves. You can use methods like banding or African threading to stretch your hair. Another option is to use a blow dryer with a comb attachment. Apply a heat protectant spray to your hair to minimize heat damage. Then, section your hair and gently stretch each section as you blow – dry it. This will help to elongate your curls or kinks, making it simpler to create the s – shaped waves.

Gathering the Necessary Tools & Products

Tools

Fine – Tooth Comb: This is essential for creating the precise s – shaped waves. The fine teeth help to smooth the hair and create the perfect curves.

Rattail Comb: Useful for creating a clean part and separating sections of hair.

Hair Clips or Duckbill Clips: These are used to hold the waves in place while they dry. Duckbill clips are especially good as they have a strong grip.

Hooded Dryer (Optional): If you’re short on time, a hooded dryer can help set the waves faster. However, air – drying is also an option.

Products

Hair Gel: A strong – hold hair gel is needed to keep the waves in place. Look for a gel that provides a firm hold without making your hair feel crunchy.

Mousse: Mousse can add volume and help create smooth, defined waves. It also gives your hair a bit of extra hold.

Hairspray: A light – to – medium hold hairspray will help set the waves and keep them in place throughout the day.

Creating the Finger Waves

Sectioning Your Hair

Begin by parting your hair in the middle or to the side, depending on your preference. Then, divide your hair into small, manageable sections. Starting from the front of your hair, take a section about 1 – 2 inches wide. Clip the remaining hair out of the way to keep it from getting in the way.

Applying the Styling Products

Apply a generous amount of hair gel to the section of hair you’ve chosen. Work the gel through the hair, starting from the roots and moving down to the ends. Make sure the hair is evenly coated. You can also add a bit of mousse on top of the gel for extra volume and hold. Use your fingers to distribute the products evenly and smooth out any tangles.

Making the First Curve (the “C” Shape)

Take your fine – tooth comb. Place your index finger along the part line of the section of hair. Use the comb to push the hair forward, creating a curve or a “C” shape. Press the hair firmly against your finger to set the shape. Hold this shape in place for a few seconds.

Completing the “S” Wave

Move your finger to the other side of the “C” shape you just created. Now, use the comb to push the hair backward in the opposite direction, creating the second part of the “S” wave. Make sure not to disrupt the first curve you made. The goal is to create a smooth, continuous “S” shape. Once you’ve made the “S” wave, secure it in place with a hair clip or a duckbill clip.

Repeating the Process

Continue this process for each section of your hair. Work your way around your head, creating waves in each section. Make sure to keep the size and shape of the waves consistent for a uniform look. If you’re using a hooded dryer, you can sit under it for 10 – 15 minutes to help set the waves. Otherwise, let your hair air – dry completely. This may take a few hours, depending on the thickness and length of your hair.

Finishing Touches

Removing the Clips

Once your hair is completely dry, carefully remove the hair clips. Be gentle to avoid disturbing the waves. If any of the waves have come loose slightly, you can use your fingers to reshape them.

Applying Hairspray

Spray a light mist of hairspray over your hair to set the waves and keep them in place. Hold the hairspray about 8 – 10 inches away from your head and spray evenly. This will help your finger waves last throughout the day.

Customizing Your Look

You can further customize your finger waves on long natural hair. For example, you can add some hair accessories like a headband or a barrette to add a touch of style. If you want a more dramatic look, you can also curl the ends of your hair after creating the finger waves for a more voluminous effect.

Conclusion

Creating finger waves on long natural hair may seem like a challenging task, but with the right preparation, tools, and techniques, you can achieve a beautiful, vintage – inspired look. Whether you’re going for a special occasion or just want to switch up your everyday style, finger waves are a great way to show off the beauty of your long natural hair. So, go ahead and give it a try!

Related topics:

How Long Does Finger Waves Last

How To Do Long Finger Waves

Effortless Elegance: How to Create Loose Waves with a Flat Iron

You may also like

blank

Welcome to our Wig Portal! We specialize in providing a wide range of premium wigs crafted to elevate your style and confidence. Whether you’re seeking a natural look or a bold transformation, we offer versatility and quality to suit every preference. Explore our collection and find the perfect wig to express your unique personality and enhance your beauty effortlessly. 【Contact us: [email protected]

© 2023 Copyright  Sorahaircut.com