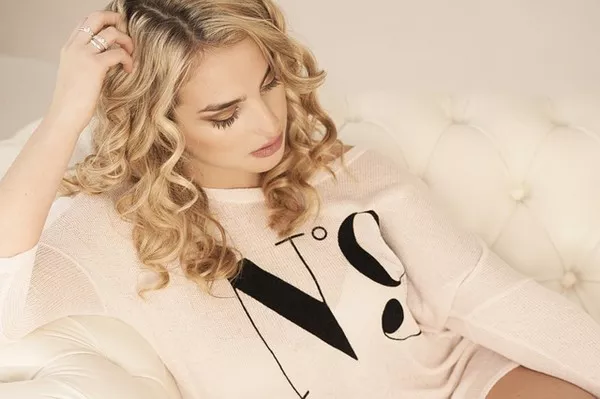
Creating spiral curls with a flat iron is a versatile hairstyling technique that allows you to achieve defined, elegant curls using a tool traditionally associated with straightening hair. This method is favored for its ability to produce long-lasting curls with a polished finish, suitable for various occasions from casual outings to formal events.
Understanding Spiral Curls
Spiral curls are characterized by their tight, springy appearance, resembling the shape of a spiral. They add volume and texture to the hair, making it look fuller and more vibrant. Using a flat iron to create spiral curls offers control and precision, allowing you to customize the size and tightness of the curls according to your preference.
Tools and Preparation
Before starting, gather the necessary tools and prepare your hair to ensure optimal results:
Flat Iron: Choose a flat iron with adjustable heat settings and preferably narrow plates for better control.
Heat Protectant: Apply a heat protectant spray or serum to safeguard your hair from heat damage.
Sectioning Clips: Use clips to divide your hair into manageable sections for easier styling.
Comb or Brush: Have a comb or brush handy to detangle your hair before styling.
Step-by-Step Guide to Create Spiral Curls
Follow these detailed steps to achieve stunning spiral curls using a flat iron:
Step 1: Prepare Your Hair
Start with clean, dry hair. Apply a heat protectant evenly throughout your hair to shield it from the high temperature of the flat iron. Ensure your hair is completely dry to prevent frizz and uneven curl formation.
Step 2: Section Your Hair
Divide your hair into small sections using sectioning clips. The size of each section will determine the size of your curls. Smaller sections create tighter curls, while larger sections produce looser curls.
Step 3: Adjust Your Flat Iron
Set your flat iron to the appropriate heat setting based on your hair type and texture. Fine or damaged hair requires lower heat (between 250-300°F), while thick or coarse hair may need higher heat (between 300-400°F). Always start with a lower heat setting to prevent heat damage.
Step 4: Begin Curling
Take a small section of hair (about 1 inch wide) and clamp the flat iron near the roots. Twist the flat iron away from your face or towards your face, depending on the direction you want your curls to go.
Twist Direction: The direction you twist the flat iron determines the direction of the spiral curl. Twisting away from your face creates curls that frame your face outward, while twisting towards your face results in curls that frame your face inward.
Step 5: Glide Downwards
Slowly glide the flat iron down the length of the hair section while continuing to twist the flat iron away or towards your face. Maintain steady pressure and consistent speed to ensure uniform curls. The slower you glide, the tighter the curl will be.
Step 6: Release the Curl
Carefully release the flat iron from the hair section once you reach the ends. Avoid pulling the flat iron downwards abruptly to prevent stretching the curl out of shape. Hold the curl in your hand for a few seconds to allow it to cool and set.
Step 7: Repeat and Set
Repeat steps 4 to 6 for all remaining sections of hair. Work methodically from one section to the next, ensuring each curl is uniform in size and appearance. Once all sections are curled, allow the curls to cool completely before styling.
Tips for Perfect Spiral Curls
Practice Control: Adjust your hand speed and twist direction to control the tightness and direction of each curl.
Cooling Time: Allowing curls to cool completely sets their shape and enhances their longevity. You can speed up cooling by using a cool shot on your hair dryer.
Final Touch: Once cooled, gently run your fingers through the curls to separate and loosen them for a more natural look. Avoid over-touching to maintain curl definition.
See Also: How To Do Pin Curls With Long Hair
Why Choose Flat Iron for Spiral Curls?
Using a flat iron for spiral curls offers several advantages over traditional curling methods:
Versatility: Flat irons can create a variety of curl sizes and styles, from tight spirals to loose waves, depending on your technique.
Efficiency: Flat irons heat up quickly and are easy to maneuver, making them ideal for quick styling sessions.
Polished Finish: Spiral curls created with a flat iron often have a sleek, polished finish due to the smooth plates of the iron.
Conclusion
Mastering the art of creating spiral curls with a flat iron allows you to expand your hairstyling repertoire and achieve salon-quality curls at home. By following the steps outlined above and practicing your technique, you can confidently create stunning spiral curls that enhance your overall look. Experiment with different curl sizes and styles to find the perfect spiral curl that suits your personal style and occasion.


