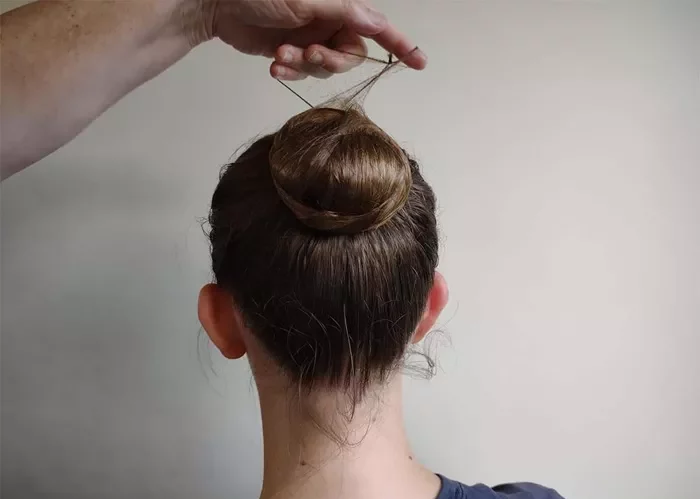
Ballet is a beautiful art form that requires precision, grace, and attention to detail. One of the most iconic aspects of a ballet dancer’s appearance is the classic ballet bun. This hairstyle is not just about aesthetics; it also serves a practical purpose. A well-secured bun keeps hair out of the dancer’s face, allowing for better focus and movement. In this article, we will guide you through the steps to create the perfect ballet bun, tailored to different hair types and personal characteristics.
Why a Ballet Bun is Essential
Practicality
A ballet bun keeps hair securely in place, preventing it from falling into the dancer’s face during performances or practice sessions. This is crucial for maintaining focus and ensuring that movements are executed with precision.
Aesthetics
The ballet bun is a timeless and elegant hairstyle that complements the clean lines of ballet costumes. It enhances the overall appearance of the dancer, contributing to the visual harmony of the performance.
Professionalism
A neatly styled bun is a sign of professionalism in the ballet world. It shows that the dancer is serious about their craft and pays attention to the details that matter.
Step-by-Step Guide to Creating a Ballet Bun
Step 1: Start with Clean, Detangled Hair
Begin by brushing your hair thoroughly to remove any tangles. Clean hair is easier to work with and will hold the style better. If your hair is particularly slippery, you can use a small amount of gel or hairspray to add some grip.
Step 2: Create a Ponytail
Gather your hair into a high ponytail at the crown of your head. Use a hair elastic to secure it tightly. The position of the ponytail is crucial; it should be high enough to allow the bun to sit neatly on top of your head.
Step 3: Twist and Wrap
Twist the ponytail tightly and begin wrapping it around the base. As you wrap, tuck the ends of your hair under the bun to create a smooth finish. Secure the bun with bobby pins, inserting them horizontally to hold the hair in place.
Step 4: Secure with a Hairnet
Place a hairnet over the bun, ensuring it covers all the loose ends. Use additional bobby pins to secure the hairnet, making sure it is tight and smooth. This step is essential for a polished look and to keep the bun secure during movement.
Step 5: Final Touches
Spray the bun with a light mist of hairspray to hold everything in place. Check for any loose strands and tuck them in with bobby pins. Your ballet bun should feel secure and look neat from all angles.
Tips for Different Hair Types
Fine or Thin Hair
If you have fine or thin hair, you may find it challenging to create a full-looking bun. Consider using a hair donut or a sock to add volume. Simply place the donut over your ponytail and spread your hair evenly over it before securing with bobby pins.
Thick or Curly Hair
For thick or curly hair, it’s essential to ensure that all hair is smoothly gathered into the ponytail before creating the bun. You may need to use more bobby pins to secure the bun and keep it in place. A strong-hold hairspray can also help manage any flyaways.
Short Hair
If your hair is too short to gather into a traditional bun, you can use hairpins to create a faux bun. Gather your hair into a small ponytail and twist it into a mini bun, securing it with bobby pins. Use a hairnet to cover any loose ends and create a polished look.
Personalizing Your Ballet Bun
Adding Accessories
While the classic ballet bun is simple and elegant, you can personalize it with accessories such as ribbons, flowers, or decorative hairpins. These additions can enhance your overall look, especially for performances or special occasions.
Matching Your Hair Color
Choose a hairnet and bobby pins that match your hair color to create a seamless look. This attention to detail will make your bun appear more polished and professional.
Considering Your Face Shape
The position of your bun can be adjusted to flatter your face shape. For example, if you have a round face, placing the bun slightly higher can create a more elongated appearance. Experiment with different positions to find what works best for you.
Common Mistakes to Avoid
Loose Hair
Ensure that all hair is securely pinned and that there are no loose strands. Loose hair can be distracting and may come undone during a performance.
Uneven Bun
Take the time to create a symmetrical bun. An uneven bun can look messy and detract from your overall appearance.
Overuse of Products
While hairspray and gel can be helpful, using too much can make your hair look stiff and unnatural. Use these products sparingly to maintain a soft, polished look.
Maintaining Your Ballet Bun
Regular Touch-Ups
Throughout the day or during a performance, check your bun to ensure it remains secure. Carry extra bobby pins and a small hairspray for quick touch-ups.
Gentle Removal
At the end of the day, remove the bobby pins and hairnet gently to avoid damaging your hair. Brush your hair thoroughly to remove any tangles and keep it healthy.
Conclusion
Creating the perfect ballet bun is an essential skill for any ballet dancer. It requires practice, patience, and attention to detail, but the results are worth it. A well-styled bun not only enhances your appearance but also allows you to perform with confidence and focus.
Remember, the key to a great ballet bun is practice. The more you do it, the easier it will become, and soon you’ll be able to create a flawless bun in no time.
Related topics:
- Fall 2024 Hair Trends: Paris and Copenhagen Set the Stage for This Season’s Must-Have Styles
- How To Do A Classical Ballet Bun
- Mastering the Perfect Bun: Expert Tips from Tracee Ellis Ross, Devon Teuscher, and James Pecis


