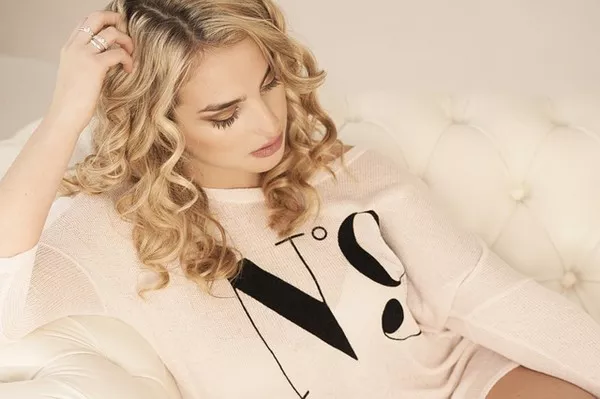
Hairstyling is an art form that continuously evolves with trends and techniques. One of the most popular styles that has gained momentum in recent years is flat iron waves. This versatile hairstyle offers a glamorous yet effortless look suitable for various occasions, from casual outings to formal events. In this comprehensive guide, we will delve into the intricacies of creating flawless flat iron waves, exploring different techniques, tips, and tricks to achieve stunning results.
Understanding Flat Iron Waves
Flat iron waves, also known as mermaid waves or S-waves, involve using a flat iron to create soft, undulating waves in the hair. Unlike traditional curling methods, which produce tight curls or ringlets, flat iron waves result in loose, natural-looking waves that mimic the movement of ocean waves. This style adds texture, volume, and dimension to the hair, making it a favorite among hairstylists and enthusiasts alike.
Choosing the Right Tools
Before diving into the hairstyling process, it is crucial to select the appropriate tools for creating flat iron waves. The primary tool required for this technique is a flat iron with rounded edges and adjustable heat settings. Opt for a high-quality flat iron made from ceramic or tourmaline plates, as these materials distribute heat evenly and minimize heat damage to the hair. Additionally, consider the width of the flat iron; narrower irons are ideal for shorter hair lengths, while wider irons are suitable for longer hair.
Preparing the Hair
Achieving perfect flat iron waves begins with proper hair preparation. Start by washing and conditioning the hair with products tailored to your hair type and texture. Towel-dry the hair gently to remove excess moisture, then apply a heat protectant spray or serum to shield the hair from heat damage. Comb through the hair to ensure even distribution of the product and detangle any knots or tangles.
Sectioning the Hair
Sectioning the hair is essential for precise styling and ensures that each section receives equal attention. Divide the hair into manageable sections using hair clips or hair ties, starting from the bottom and working your way up towards the crown. The size of the sections may vary depending on the thickness of your hair and the desired wave pattern. Smaller sections create tighter waves, while larger sections produce looser waves.
Techniques for Creating Flat Iron Waves
There are several techniques for creating flat iron waves, each offering a unique wave pattern and texture. Experiment with different techniques to find the one that best suits your hair type and desired look. Below are some popular techniques for achieving flat iron waves:
Classic S-Waves Technique:
-
- Begin by clamping a small section of hair between the plates of the flat iron.
- Twist the flat iron away from your face, creating an “S” shape as you glide it down the length of the hair.
- Continue twisting the flat iron in alternating directions as you move down the hair shaft, alternating between inward and outward twists.
- Release the hair from the flat iron and allow the waves to cool before gently tousling them with your fingers for a more natural look.
Twist and Pull Technique:
-
- Take a small section of hair and twist it tightly from root to tip.
- Clamp the twisted section between the plates of the flat iron, holding the iron vertically.
- Slowly glide the flat iron down the length of the twisted hair, allowing the heat to set the wave pattern.
- Release the twisted hair from the flat iron and gently unravel it to reveal the waves.
Vertical Waves Technique:
-
- Divide the hair into vertical sections, rather than horizontal sections, for a different wave pattern.
- Clamp a small section of hair between the plates of the flat iron, holding the iron vertically.
- Twist the flat iron away from your face as you glide it down the length of the hair, creating vertical waves.
- Continue this technique throughout each section, alternating the direction of the twists for a more natural look.
See Also: How To Get Silky Curly Hair Naturally
Tips for Perfecting Flat Iron Waves
Achieving flawless flat iron waves requires practice, patience, and attention to detail. Here are some additional tips to help you master the art of flat iron wave styling:
Adjust Heat Settings: Start with a lower heat setting on your flat iron and gradually increase the temperature as needed. Avoid using excessive heat, as it can cause damage to the hair.
Work in Small Sections: Smaller sections of hair allow for more precise styling and ensure that each wave is properly formed.
Alternate Directions: To create a natural-looking wave pattern, alternate the direction of your twists with each section of hair.
Let Waves Cool: Allow the waves to cool completely before touching them to ensure that the wave pattern sets properly.
Use Product Sparingly: Avoid overloading the hair with styling products, as this can weigh down the waves and make them appear limp.
Experiment with Texture: Play around with different textures and finishes, such as matte pomades or texturizing sprays, to enhance the waves and add dimension to the hairstyle.
Conclusion
Flat iron waves offer a chic and effortless hairstyle that is perfect for any occasion. With the right tools, techniques, and tips, you can achieve stunning waves that elevate your look and showcase your hairstyling skills. Whether you prefer classic S-waves or modern vertical waves, experimenting with flat iron wave techniques allows you to unleash your creativity and express your personal style. So, grab your flat iron and start waving your way to fabulous hair!


