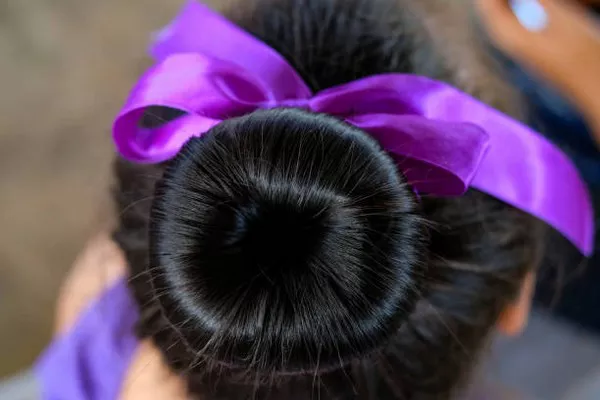
The donut bun is a versatile and elegant hairstyle suitable for various occasions. Whether you’re preparing for a formal event or looking for a chic everyday style, the donut bun can be tailored to fit your needs. This guide will provide a detailed, step-by-step explanation of how to achieve the perfect donut bun, along with tips and suggestions for different variations.
Introduction to the Donut Bun
The donut bun is named for its shape, which resembles a donut. It is created by using a foam or fabric donut to form a perfectly rounded bun. This style offers a neat and polished appearance, making it popular for both casual and formal settings.
Benefits of the Donut Bun
Elegant and Polished Look: The donut bun provides a clean and sophisticated look that suits formal events.
Versatility: It can be adapted for different occasions, from office wear to evening outings.
Easy to Create: With the right tools and techniques, the donut bun can be quickly assembled.
Secure Hold: The donut bun offers a secure hold, making it ideal for long days or active events.
Tools and Materials Needed
Before you begin, gather the following items:
Donut Bun Form: Available in various sizes and materials (foam, fabric). Choose one that matches your hair length and desired bun size.
Hair Elastics: Use strong, elastic bands to secure your hair.
Bobby Pins: For additional hold and to secure any loose strands.
Hairbrush or Comb: To detangle and smooth your hair.
Hairspray (Optional): To add extra hold and control flyaways.
Steps to Create a Classic Donut Bun
Step 1: Prepare Your Hair
Start with Clean Hair: Wash and condition your hair to ensure it is free from oils and products. Dry your hair thoroughly before starting.
Brush Your Hair: Use a hairbrush or comb to remove any tangles and create a smooth surface.
Step 2: Create a Ponytail
Gather Your Hair: Brush your hair back and gather it into a high ponytail. Use an elastic band to secure the ponytail in place.
Smooth the Ponytail: Ensure the ponytail is smooth and free from bumps.
Step 3: Insert the Donut Bun Form
Position the Donut Form: Slide the donut bun form onto the ponytail. Place it at the base, close to the hair elastic.
Spread Your Hair: Divide your hair evenly around the donut form. This will help in creating an even, round shape.
Step 4: Create the Bun
Wrap the Hair Around the Donut: Starting at the ends of your hair, wrap it around the donut form. Ensure that the hair covers the entire donut form evenly.
Secure the Bun: Use bobby pins to secure the hair around the donut form. Pin any loose strands to ensure a neat appearance.
Step 5: Final Touches
Adjust the Bun: Make any necessary adjustments to ensure the bun is centered and even.
Apply Hairspray (Optional): For extra hold, apply a light mist of hairspray.
See Also: How To Tie Ballerina Bun
Variations of the Donut Bun
Messy Donut Bun
The messy donut bun offers a more relaxed, casual appearance. To achieve this look:
Create a Loose Ponytail: Secure the ponytail loosely.
Wrap Hair Around the Donut: Allow some strands to fall out as you wrap the hair around the donut form.
Secure with Bobby Pins: Use bobby pins to secure the loose strands and create a tousled effect.
Low Donut Bun
The low donut bun is ideal for a more sophisticated and understated look. To create this style:
Position the Ponytail Low: Gather your hair into a low ponytail at the nape of your neck.
Follow the Classic Steps: Insert the donut form and wrap the hair around it as described in the classic bun steps.
Side Donut Bun
The side donut bun adds a unique twist to the classic style. Follow these steps:
Create a Side Ponytail: Gather your hair into a ponytail positioned to one side of your head.
Insert the Donut Form: Slide the donut form onto the side ponytail.
Wrap and Secure: Wrap the hair around the donut form and secure with bobby pins.
Tips for a Perfect Donut Bun
Choose the Right Size Donut: Select a donut form that matches your hair length and desired bun size for a proportionate look.
Use Hair Products: Consider using styling products like mousse or volumizer for added texture and hold.
Secure Loose Strands: Ensure that all hair is secured with bobby pins to avoid any stray strands.
Practice Makes Perfect: The more you practice, the more proficient you will become at creating a flawless donut bun.
Common Mistakes to Avoid
Using an Incorrect Size Donut: Choosing a donut form that is too small or too large can affect the final appearance of the bun.
Insufficient Securing: Not using enough bobby pins can result in the bun falling apart throughout the day.
Skipping the Preparation: Failing to properly prepare your hair can lead to an uneven or messy bun.
Conclusion
The donut bun is a classic hairstyle that can be adapted for various occasions. By following the steps outlined in this guide, you can create a perfectly polished bun that complements your look. Whether you opt for a classic, messy, low, or side donut bun, the key is to practice and refine your technique for the best results. With the right tools and a little patience, you can master this elegant and versatile hairstyle.


