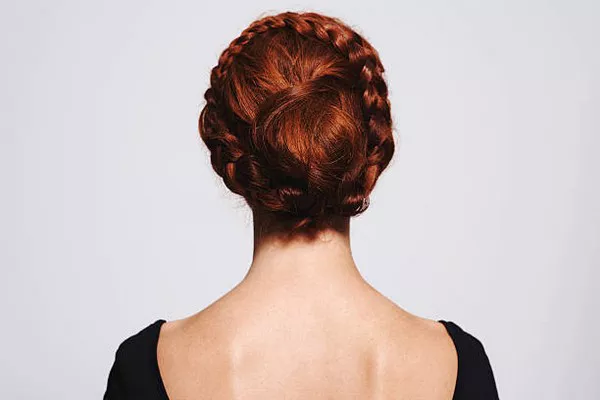
Creating a classical ballet bun is a timeless skill that every dancer and enthusiast should master. This elegant hairstyle is not only practical for dance but also exudes sophistication and grace. In this article, we will walk you through each step to achieve a perfect classical ballet bun. With detailed instructions and helpful tips, you’ll be able to create a flawless bun that stays secure throughout your performance or daily activities.
Understanding the Classical Ballet Bun
What Is a Classical Ballet Bun?
A classical ballet bun is a sleek, polished hairstyle that is essential for ballet dancers. It keeps the hair neatly secured and away from the face, allowing for maximum movement and focus during performances. The bun is typically centered at the back of the head and is created using a combination of bobby pins, hair ties, and sometimes a hair donut or padding.
Why Is It Important?
In ballet, a classical bun is not just about aesthetics; it is also about functionality. The hairstyle ensures that the dancer’s movements are not obstructed by loose hair, and it helps in maintaining a clean and professional appearance. Additionally, the bun helps in emphasizing the dancer’s posture and lines, contributing to the overall elegance of the performance.
Preparing Your Hair for a Ballet Bun
Wash and Dry Your Hair
Before starting, make sure your hair is clean and completely dry. Washing your hair a day before can be ideal, as it allows natural oils to slightly build up, making the hair easier to manage. If your hair is too clean, it might be slippery and harder to secure.
- Shampoo and Condition: Use a mild shampoo and conditioner suitable for your hair type.
- Dry Thoroughly: Pat your hair dry with a towel and then blow-dry it. Ensure it’s completely dry before proceeding.
Brush Your Hair
Brushing your hair helps in detangling and ensures a smooth surface for the bun.
- Use a Wide-Tooth Comb: Start with a wide-tooth comb to gently detangle wet hair.
- Switch to a Brush: Once the hair is detangled, use a brush to smooth it out.
Apply Hair Products
Using the right products can make your bun last longer and look more polished.
- Hair Gel or Mousse: Apply a small amount of hair gel or mousse to add hold and volume.
- Hairspray: Lightly spritz hairspray to add extra hold, especially if your hair tends to be frizzy.
Creating the Classic Ballet Bun
Step 1: Gather Your Hair
- Create a Ponytail: Gather all your hair into a high ponytail. Use a hair tie to secure it firmly at the crown of your head.
- Smooth the Ponytail: Ensure the ponytail is smooth and free of bumps.
Step 2: Prepare for the Bun
- Use a Hair Donut or Padding (Optional): For a fuller bun, you can use a hair donut or padding. Slide it onto the ponytail to help shape the bun.
- Wrap the Hair Around the Donut: Spread the hair evenly around the donut, covering it completely.
Step 3: Form the Bun
- Wrap and Tuck: Wrap the hair around the base of the ponytail or donut. Tuck the ends underneath the bun and secure them with bobby pins.
- Pin in Place: Use bobby pins to secure the bun. Insert the pins from different angles to ensure the bun is secure and stable.
Step 4: Secure and Finish
- Apply More Hairspray: Lightly spray hairspray over the bun to set it in place.
- Check for Loose Strands: Ensure there are no stray hairs or bumps. Use a fine-tooth comb to smooth out any imperfections.
Tips for a Perfect Classical Ballet Bun
Use the Right Tools
- Bobby Pins: Use bobby pins that match your hair color for a seamless look.
- Hair Donut or Padding: Optional but helpful for a fuller bun.
Consider Your Hair Type
- Fine Hair: You might need extra hair products to add volume and hold.
- Thick Hair: You might require more bobby pins to secure the bun.
Practice Makes Perfect
- Try Different Techniques: Experiment with different methods to find what works best for your hair type and style.
- Regular Practice: Practice creating the bun regularly to improve your speed and technique.
See Also: How To Do Neat Bun
Troubleshooting Common Issues
Bun Falls Apart
- Check Pins: Ensure all pins are secure and properly placed.
- Use More Product: Apply additional hairspray or gel to keep the bun in place.
Hair Looks Messy
- Smooth with a Comb: Use a fine-tooth comb to smooth out any bumps.
- Adjust the Bun: Re-wrap and tuck the hair if necessary.
Hair Slips Out
- Add More Pins: Use additional bobby pins to secure any loose sections.
- Use Texturizing Spray: Apply texturizing spray to add grip to your hair.
Maintaining the Classical Ballet Bun Throughout the Day
During Dance Rehearsals
- Check Periodically: Make sure the bun remains secure and tidy.
- Carry Extra Pins: Keep some bobby pins and hairspray handy for quick touch-ups.
For Daily Wear
- Avoid Touching: Try not to touch or adjust the bun frequently.
- Reapply Hairspray: Lightly reapply hairspray as needed to maintain hold.
Conclusion
Creating a classical ballet bun requires practice, precision, and the right techniques. By following the steps outlined in this guide, you can achieve a professional-looking bun that complements your ballet attire and enhances your performance. Remember to prepare your hair properly, use the right tools, and practice regularly to perfect your technique. With these tips, you’ll be able to create a flawless classical ballet bun that stays in place and looks stunning every time.


